Showing posts with label FPP Super Monobath. Show all posts

Wednesday, June 13, 2018

Mano a Mono- Developing film in the FPP Monobath

To be honest, I have been known to dismiss the use of a monobath for developing film.  I was skeptical of such processes, as if they were some sort of alchemy.  The idea of develop and fix in ONE bottle was blasphemy to my ears.  You might as well have tried to convince me that you were transmuting lead into gold.   Of course, I am exaggerating my skepticism, but I certainly needed to be convinced that it was worth trying.

What is a monobath anyway?  - Simply put, it is a solution containing a developer and fixer for b&w film.  Hold on there a bit. Yes, it can also be a color process as well.  If you ever shot a Polaroid or an Instax image, it's essentially a monobath process to develop the film. There is no multi-step process like conventional C-41 or E-6 film. Otherwise, yes, it's magic. B&W films also typically use a 3-step process, with different times for various films and developers. With a monobath, it's just one time for all b&w films.

How does it work?  Magic?  No, of course, not.  What happens is that the developer is aggressive, and the fixer takes a while to kick in, which by that time, the developer has mostly done its job. Because of this dynamic, several things may happen depending on the film and the exposure.  1 - there may be reduced contrast 2 - there may be a loss of shadow detail 3. there may be increased contrast  4 - some films may need additional fixing 5 - some monobaths may cause excessive grain, raise the film speed, or cause fog. Different monobath formulas have their own peculiarities and effects on any single type of film. Monobaths are often used at higher than 20°C.
FPP Super Monobath from the FPP site.

Monobaths have been around since the late 1800s, and were popular in the 1950s and 60s with photojournalists. Quick results meant the image got to the editor sooner. Polaroid's b&w film used a monobath, making photography truly instant.  However,  modern monobath formulations date to about 1974, when G.W. Crawley published a recipe in the British Journal of Photography.  You can easily search for the recipe and its variants, as there are a few.  Some of the monobaths were created specifically for certain film types.  More recently, Donald Qualls came out in 2004 with a monobath recipe that just uses HC110, ammonia, and fixer concentrate. If you want to mix your own, you can easily find the formulas online.  However, most people would rather purchase a product that is ready to use.  It avoids having to find and mix the different chemicals, and is also more convenient.

Earlier this year, the Film Photography Project store started carrying its own monobath.  The FPP Super Monobath comes in a 1 liter bottle, already mixed.  What's more, using it is pretty simple - 3.5 minutes at 24 degrees C.  That's it.  Each liter bottle can develop 10 to 15 rolls of film. After talking with Leslie, Mat, and Mike, I was convinced to try some and have been trying it out on different films.

FPP 200 film, in the FPP Studio, Nikon N2020 :


The FPP 200 film had excellent results with the FPP Super Monobath

Now, a few examples from Svema 200, with a Yashica ME-1:


The Svema 200 scanned pretty well, and I like the punchy results.

Now, an oddball film - Orwo NP-55, a 64 ISO old-stock film (Leica R4, 35-70 lens):


While I felt that the NP-55 negatives looked a bit "thin", they scanned in quite well.  Overall, quite happy with my results!

My workflow with the FPP Super Monobath is quite simple, as are the items that you need to proces a roll of film.
You need: a thermometer, developing tank, Monobath, FPP Archival Wash, water, and a changing bag if you don't have a darkroom.  Why the Archival wash?  It makes the rinsing go much faster, and you'll get the fixer residue completely removed.  Also, some Kodak Photoflo is a good idea for a final rinse to avoid streaks on the film when drying.

I load the film in a Jobo reel and tank because the reels are easy to load for 35mm.  I bring my monobath up to 24°C in a water bath, and  I prewash the film for a minute before adding the monobath.  I pour out the prewash and pour in the monobath.  I agitate for the first 10 sec and then three inversions every 30 sec.  After 3.5 min have elapsed, I pour the monobath back into the bottle. I pour water into the tank and rinse for 30 sec.  I then pour in the Archival Wash and discard after 1 minute, followed by another 1 minute water rinse. A final bath in water with Photoflo for 30 sec and I can take the film off the reel to hang dry. Basically, it takes about 5-10 minutes to develop a roll and hang it to dry.

My results have been quite satisfactory for most of the films that I have tried.  Others have had great results with the typical b&w films from Kodak and Ilford.

You may wonder why use a monobath?  While I have my favorite developers, the FPP Super Monobath is just the thing when I want to test out a camera.  Its simplicity of use makes it an ideal candidate for developing on the road, as you don't have to mix anything.  I'll be trying it out on a road trip later this year!


Thursday, May 10, 2018

Out and About with the Yashica ME1

A funky little 35mm camera came my way recently, and one that I knew little about, at that.  A Yashica ME1 is an attractive little zone-focus camera manufactured in Japan in 1970 and Brazil, starting in 1977. My example was made in Brazil. What sets this little camera apart from other small 35s, is the clean design of the top plate, which features only a shutter button, hot shoe, and a frame counter.  The film advance wheel is on the lower rear L of the camera, and the film rewind is on the bottom right.  This is an all-black plastic camera that features the typical ASA setting dial around the lens with a CdS cell on the front lens plate.  The film speed settings range from an ISO of 25 to 500.  The 38mm f/2.8 lens is pretty much right there with a slew of other compact 35s that proliferated in the 70s and early 80s.  Like many other cameras of its time, it requires a Mercury PX635 cell to power the camera, but I popped in a LR44, and the camera sprang to life. With b&w and C-341 film, the exposure difference between the two battery voltages should not be a problem.  The shutter speeds range from a paltry 1/60 - 1/360 sec, and the shutter locks if you leave the lenscap on or do not have enough light (nice feature).  The exposure is all automatic, and you look in the viewfinder to see if the needle is in the "green zone."  The self-timer (ca. 8 seconds) is in a typical spot to the right of the lens barrel.  Focus is indicated by the icons, 1m, 1.5m, 3m, and infinity, with feet and meters on the opposite side of the lens.

In the hand, this camera feels very natural,and the bottom L-positioned thumb wheel film advance seems perfect for this little camera. You can wind on and shoot pretty quickly. While its specifications are quite ordinary, it is certainly capable of taking good photographs under typical conditions.  One feature that surprised me is the extra little window in the viewfinder that shows your distance setting and whether you will need to use the parallax correction markings in the bright viewfinder.  That is a nice feature, and the needle in the right side of the window indicates whether your exposure will be adequate.  The red zone means you'll require a flash, or the shutter locks up, unless you set the aperture manually, off the A position.
from the manual via Butkus.org

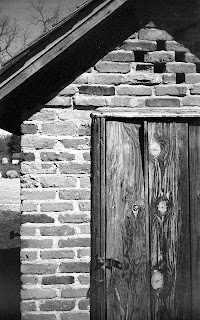
I loaded a roll of Svema 200 b&w film, and shot a test roll last month.  I developed it in the new FPP Super Monobath for 3.5 min at 24°C.  The Svema film is a bit punchy - contrasty with some grain, but overall, the images look pretty good for basically a p&s 35mm camera.


Elsewhere, I have seen the ME1 compared to the Minolta Hi-Matic G and the Olympus Trip 35, which is a fair comparison.  However, I would give the Hi-Matic a better overall score due to its more robust build. Same for the Trip 35, which is in a class by itself because it does not require batteries, and if you have one that works, you know that it is a great little camera. My example of the Yashica ME1 came with a dented filter ring, which is too bad.  It does take 46mm filters like many other small 35s in its class.  The Yashica ME1 is an attractive little camera, and its Brazilian manufacture makes it an unusual camera among 35mm cameras of the 1970s.   Prices on ebay for this camera range from $15-$55.

Yashica produced over 40 different 35mm non-SLR models, and the Electro 35, Lynx and Minister series are usually the first ones that come to mind. Most are true rangefinder cameras, but a few are zone-focus.  The ME1 is a far different camera than the metal-bodied Electros, being more compact, but still having good Yashica glass.  It's not going to be the be-all compact 35, but it is easy to use, lightweight, and certainly affordable.  Unlike the much larger Electro series, it won't suffer from oddball battery requirements and bad electronics.  Certainly worth a try if you see one in a shop. If you need a manual, it hardly goes without saying that you'll find one at Jim Butkus' site.