Monday, December 28, 2015

It's the Holiday Season

Holiday Flash Brownie
Now that I can develop my own C-41, it's given me the chance to catch up on some larger roll-film developing, and this roll of Kodak Portra 160 that was respooled for 127 had been sitting on my shelf since after World Toy Camera Day (back in early October).   I shot it in a Kodak Brownie Holiday Flash, an unassuming little Bakelite camera that has been sitting on my shelf, as well. As far as 127 goes, it's a full-frame model, meaning that the negatives are ca. 4x6 cm, giving 8 shots per roll. This camera has a Dakon lens, so it was manufactured  between 1955 and 1963.
I didn't know what to expect from this little camera, but I took it out for a walk to peach Mountain Observatory near Dexter, MI, and it turns out that it may have given me the best images for WTCD that I've taken in a while.
It certainly qualifies as a toy camera, as there is only a shutter button for control.  That's as rudimentary as any box camera.  The Holiday Flash Brownie also has a glass cousin, a Christmas tree ornament that I bought about 5 years ago. It's one of
my favorite ornaments, and looks very much like the real thing.
So, I developed the roll of Portra today, and I was astonished at how good the negatives were.  I don't have any film holders for 127, so I simply used the area mask in my V700 scanner, laid the negs emulsion-side down, and covered them with a sheet of 8x10 glass to flatten them out.  I had to tweak the orientation a bit, but overall, the scans came out quite good.  Peach Mountain is mostly UM property, and there is a radio astronomy observatory, as well as a Lowbrow Astronomers Observatory with a 24" optical telescope, and an abandoned UM observatory. All make for some interesting images.  The sunny day and open shade did not thwart the Portra 160's latitude.  I can see why this film was used in school portrait cameras, which is where the bulk rolls of Portra 160 come from.

Here is a screen capture of the negatives, followed by some of the scans.


Friday, December 25, 2015

My First Foray into Home C-41 Developing!

I don't know about others, but even though I have been developing my own b&w film for many, many years, I hesitated about trying to develop C-41 or E-6 films at home.  Like so many things, it's the fear of the unknown and of course, fear of screwing it up. So many steps, and the temperatures... how can I even try this?  I suppose someone that has never developed b&w film might feel the same way before doing so, and consequently realizing it was actually fairly easy.

So, with some urging by my super pals, Leslie and Mike, I ordered a couple of Unicolor C-41  kits from the FPP store. For $19 a kit, it's a pretty cheap experiment, and it's only a 3-step process. The fun fact here is that the kits are manufactured in Dexter Michigan, by Photo Systems, Inc. I have driven past the place many times over the years without giving it a thought!
1-L C-41 kit from FPP

I opened the first kit and carefully read the directions.  All the chems are dry and need to be mixed to 1L final amounts.  I highly recommend doing this mixing AND the developing with proper PPO - gloves, lab coat or apron, and eye protection.  It's not that the stuff is dangerous, but you are mixing  chemicals, after all.  Make sure that you have 3 clean plastic 1L bottles for the Developer, Blix, and Stabilizer solutions. I suggest the brown plastic darkroom containers. Make sure each one is labeled properly as to the contents. You can even put a (1) for the Developer, a (2) for the Blix and a (3) for the Stabilizer, in case you are worried about not doing things in the right sequence.  The Blix is a combination bleach and fix, and is probably the most caustic of the things you will deal with.

Temperature -- I use a deep plastic tub with hot water in it to bring the final temps of the Developer and Blix to 102°F.  The pre-soak (1 minute) should also be around the same temp.  Having several dial-type thermometers is very useful for monitoring the temps.  When doing the developing, make sure you immerse the tank into the tub to maintain the developer temp.  After finishing the Blix step, wash the film in water that is between 95°F and 105°F.  The Stabilizer is room temp., and is the very last step.  From Leslie, I got the tip to use a microfiber cloth wetted with Stabilizer to wipe down the back of the film (NOT the emulsion side) to avoid spotting (added in edit -- THIS IS AFTER removing the film from the Stabilizer bath. I found I was getting spots on the film side upon drying).

After each step, pour the Developer, Blix and Stabilizer back into their respective containers for re-use. This is not a 1-shot process.  Each liter should be good for at least 10 rolls of film.

You will need to "burp" the Blix after each set of inversions, as it generates some gas during its part of the process.  I use Jobo tanks and reels, so the top plastic seal just needs to be loose after the inversion set.

My initial fears were quite unfounded, as my film came out very good.  My first roll was some long-expired Kodak HD 400, and the results were what one might expect from old film.  My second and third rolls were fresh Kodak 200, and the results were excellent.  So, I am now doing my owwn color developing.  E-6 is next, and the temperatures are not as high as C-41.

Some examples from my rolls (all scanned on Epson V700) :
Plattsburgh, NY - Kodak 200, Olympus Trip

Amenia, NY, expired Kodak HD400, Olympus Trip

Kodak, 200, Olympus Trip

Adirondacks, Kodak 200, Olympus Trip

Ann Arbor, Kodak 200, Leica M2

Ann Arbor, Leica M2, Kodak 200


Wednesday, December 09, 2015

New Acquisition! The Classic Retina Automatic III

Last week I was downtown, checking out Antelope Antiques on Liberty.  The store usually has some cameras for sale, and every once in a while I find  something there that I buy.  The Kodak cameras I usually see are Ponies, ugly as sin Kodak 35s, and Brownies of some sort.  This time, I found a Kodak Retina Automatic III.  I have owned or handled a bunch of Retinas over the years, and still have a Retina IIa, a solid, wonderful 35mm camera.  The Retina Automatic III (1961-1963) features a 45mm f/2.8 Schneider Xenar lens, shutter-priority automation controlled by a Gossen selenium meter, as well as manual control. Shutter speeds are B, 1/30-1/500 sec. There is PC- flash sync, a cold shoe, and a pretty nice coupled rangefinder. The camera has lots of chrome, and is a typical late 1950s to early 60s build.  The film advance is on the bottom, making it quite easy to use.  I put a roll of Svema FN64 in it, and did some test shots around campus in A mode, to see what kind of automated exposure I was getting.  After I developed the film, it was clear that the metering is likely off, as the shots taken in full sun were badly overexposed.  I'll shoot another roll under full manual using an external meter and see how things turn out.
The camera is quite easy to use, and feels pretty good in the hands.  This particular example is in like-new condition, and I suspect being kept in the leather case all these years was one reason.  I doubt the original owner used it much, judging by the pristine condition.

A few examples from the test roll:


Thursday, November 26, 2015

Svema FN-64 - try this film!

I have been using various b&w films over the many years of my photography. Some of them have come and gone, only to pop up in small quantities long after they have been discontinued, such Panatomic-X, which remains one of my favorite slow-speed b&w films.  The problem with some of these finds is that it's a small quantity, and I am using long-outdated film.  Someone else may have different results because their film wasn't stored properly over the years.  So, while using outdated film is an adventure, it's certainly not something I recommend for serious work, or repeatable results. What then, about some of the oddball films out there?  The Film Photography Project's Mike Raso has been an incredible sniffer-outer of some unusual film stocks in large quantities.  Last year, he was able to import a lot of 35mm film manufactured by Svema, the Ukrainian film company.  For most of us, Svema 64 was a film we had only seen in the guise of outdated single rolls from Russian sources.  I once shot a roll that dated from the 1970s. Then, the FPP started selling a slew of Svema films, ranging from ultra-slow ISO3 to Svema 200, and the Svema 125 color film (also a real favorite).

The new  Svema films are all on polyester or PET bases, making them exceptionally resistant to curling after development. That makes them scan beautifully, with everything being perfectly flat.  Some of them are on a very thin base (Svema 100) that is also super strong (reviewed here).  The Svema color 125 has a muted "old-school" color palette that I find very likable, and quite different from the supersaturated Fuji colors.  I highly recommend it for portraits.

 However, my favorite Svema film is the FN-64.  At an ISO of 64, it's not super slow nor really fast, and is a good choice for many situations.   I have been using it a lot in my Olympus Trip 35, and the results have been very good.  I use Rodinal to develop it at 1:25 for 6.5 minutes, and the negatives are very impressive to me.  Some grain, and of course other developers will give different results. The Massive Development Chart has plenty of information to guide you on that.

A few examples from the Olympus Trip 35:
somewhere in Wisconsin
UM campus diag, Ann Arbor

M

UM building, Ann Arbor

Minneapolis reflections

Hyatt Regency hotel, Minneapolis
The wonderful aspect to all this is that this film is fresh-dated, and is available in quantity. The bulk rolls of 100 feet are a bargain.  I highly recommend trying the FN-64.  I have yet to make any darkroom prints from it, but I will be doing so this winter.   You can always but a couple of  rolls and see how you like it.  I think you'll be pleased with the result.

Wednesday, November 25, 2015

Is the Holga Factory Closing?

Last night I saw a post on the A3C3 Facebook page, telling us that the Holga factory in China had closed  and whatever stock retailers had would be it.  Shocking!  Freestyle Photo has a page up that indicated this is the case, and it's not April Fool's Day.  So, if this is true, it comes as a complete surprise.  Holga has been the mainstay of toy camera users for nearly 20 years, and has been producing 35mm to 120 wide-format pinhole Holgas, twin-lens Holgas, etc.  Still very basic plastic cameras, and probably cost a fraction to make compared to the selling price. I found this Wall Street Journal article on the Holga factory, which is quite interesting.  Hand-assembled.  Maybe they cost more to make than I thought. In doing some searches, I found this blog, which showcased some of my work from 2012!

After reading the FB post, I went online to Amazon and bought a spare for $31.  I'll leave that one in the box until I actually need to use it. The plain old Holga 120N -- my favorite.  You may love this article I found from 2012.

So, stock up while you can.  In 2002, I paid $15 for a Holga, and now they are over $30 each.   You can also buy a true bargain, the Debonair Camera from the FPP store for the very reasonable price of $19.99.


UPDATE:  It's official. Phone call to Freestyle confirms closing of Holga.

Sunday, November 22, 2015

Adjusting One's Vision

I am behind in posting here -- It's been a very busy month, and I was away on a work-related trip to Minnesota.  Between that and catching up, and scanning many, many rolls of film, I have a lot of posts coming up soon.  However, I am switching gears here for a bit to talk about a bit of a revelation I recently had.
Regulars to this blog probably are familiar with my toy camera work, and my love of trying different lenses that are going to give me a different result than the usual sharp and contrasty perfection we all crave.   I have been using a Nikon 1J1 for several years now as part of my photography toolkit, and it's a perfect small mirrorless system camera for taking on trips.  My recent trip to Minnesota was by car, so I took a few cameras, but not my usual gear.  I packed a bag with my Minolta XG-M and lenses, Olympus Trip 35, Yashica A TLR, and the Nikon 1 bag.   Part-way through the 6 days on the road, the Minolta SLR stopped firing its shutter, making me rely on the other cameras to do the job.  Basically, readjusting my shooting to the tools I had.  The Nikon 1 is a good camera for trip shots, and while I did some shooting with the 28mm and 50mm  35mm equivalent lenses, I wanted something less than perfection, and more along what I wanted from a toy camera.  Thus, I put on the 16mm f/1.6 C-mount lens as shown below. (I also used a 25mm c-mount lens with an adjustable aperture, and while both give me very desirable effects, the 16mm gives me the vignetting.  Examples from both lenses are below.)
There is only the one wide-open aperture setting, and the lens focuses from about 2 feet to infinity. I have to use the 1J1 in totally Manual mode, as well.  This combination gives me exactly the kind of dreamy, slightly vignetted images that are sharp at the center and fall off towards the edges.  No software is involved in making the images I like, and straight out of the camera images look like they were done with a cheap toy camera, but better.

I love this combo so much,  that I may just use it like this most of the time.  Obviously it's not great for every subject, but it makes some deliciously soft images that perfectly (to me, at least) provide the emotive reaction I had when shooting the scenes in Wisconsin and the Upper Peninsula of Michigan.    Sometimes it takes a happy accident to point out a direction one should take, and I might not have shot with the 1J1 nearly as much if the SLR had been working reliably.  Adjusting my vision accordingly, the Nikon 1J1 with the c-mount lens provided me with a creative tool that enable me to come back with some different images than I would have shot with the SLR.

Eagle River, WI

Land O' Lakes, WI

what the sign says

grassy dunes at AuTrain Bay, MI

AuTrain beach

AuTrain bay
Vilas Theater, Eagle River, WI

Saturday, October 31, 2015

Notes From a Road Trip- Part 1.

I have not been posting much this past month -- I have been busy with many things, and for over a week, I was on the road in New York State. Although Michigan has been my home for the past 34 years, my first 24 were spent in NY.  Born in Watertown, grew up pretty much in Parishville (at the edge of the Adirondacks), and went to college in Syracuse.  My wife Adrienne is from Amenia, in Dutchess Co., about 2 hrs N of New York City.  So for me, anything below Syracuse is "down-state."
I intended this trip to be primarily a photo trip, visiting places where I lived many years ago, and to explore some new spots, too.  Some of it was visiting my in-laws in Amenia, and yes, it was a lot of driving.  We put 1,958 miles on during this trip, and my 4-cylinder 2009 Ford Escape carried us along quite well with a max Avg. MPG of 33 mpg and a low of about 29.
Equipment-wise, I packed relatively simply for a change.  Two bags.  Bag one had a Nikon FM2N, 24mm, 50mm and 105 mm lenses; Leica M2 w/35mm 1.4 lens; Yashica A TLR.  Bag 2 had my Nikon F100, 24-50mmm, 85mm 1.8, and 180mm 2.8 lenses, flash, various filters.  Also in the bag was my Olympus Trip 35, a Diana mini, and a Holga.  One digital camera -- my Fuji X100S was used as well to supplement the film shots.  The F100 was used for shooting slide film, and the FM2N was used with b&w.  Most of the B&W films were Ilford.  Over the course of 8 days I shot 15 rolls of film and a several hundred digi shots.
some film to be processed


end of the day on 10/21

We left Ann Arbor on 10/19, choosing to take Rt. 80 throgh Ohio and PA, and then drop down to 86 (17) once we were in NY.  That meant we were by-passing the NYS thruway through Buffalo and Rochester, and on smaller roads to see what was there, which is my preferred way to travel when I am not in a hurry.  We entered at State Line, NY (really that is the name of the place), and ended up in Westfield, NY.  Along the way we encountered mile after mile of vineyards, and Westfield is where C.E. Welch moved his company to in 1897.  An imposing brick building in Westfield was erected in 1910 by Welch.  We stopped there and I walked a bit around the town and shot with the Fuji.  A small diner caught my eye, but we were not yet ready for lunch.


Small towns are almost always interesting places to explore -- some have charm, and some lack it in abundance. Westfield has charm.  The downtown was pretty active for a Monday morning, and a smattering of small shops were open.
The town has a small "town square" that was quite pretty.


The town hall.
I don't know if Welch is still a big player in the town, but I suspect that many of the grapes grown nearby end up in their jams or juice.
The next part will have detail on the trip to northern NY from Syracuse.  Stay tuned.


Gotta love the old signs.

Thursday, October 08, 2015

What a Weekend! The FPP Comes to Ann Arbor.

Many months ago, Mike Raso of the Film Photography Project asked me if I thought Ann Arbor would be a good spot to hold a one-day photowalk, and if the Ann Arbor Area Crappy Camera Club would be interested in assisting/participating.  I immediately said "Yes!"  I knew that people would love photographing here, and the added attraction of the Argus Museum would be another plus.  So, we made the plans, Leslie Lazenby  and I got together and coordinated  the schedule, and hoped for the best.  Nearly 60 people pre-registered for the FPP Ann Arbor PhotoWalk, which was held on October 3.
On Friday, Oct. 2, Mike Raso met me downtown for lunch, and that evening, Leslie, Mike, and I stuffed the goody bags for the attendees and firmed up what we would be doing the next day.  Saturday dawned chilly, windy, and a possibility of rain.  Undaunted, photographers started showing up at our rendezvous point at 
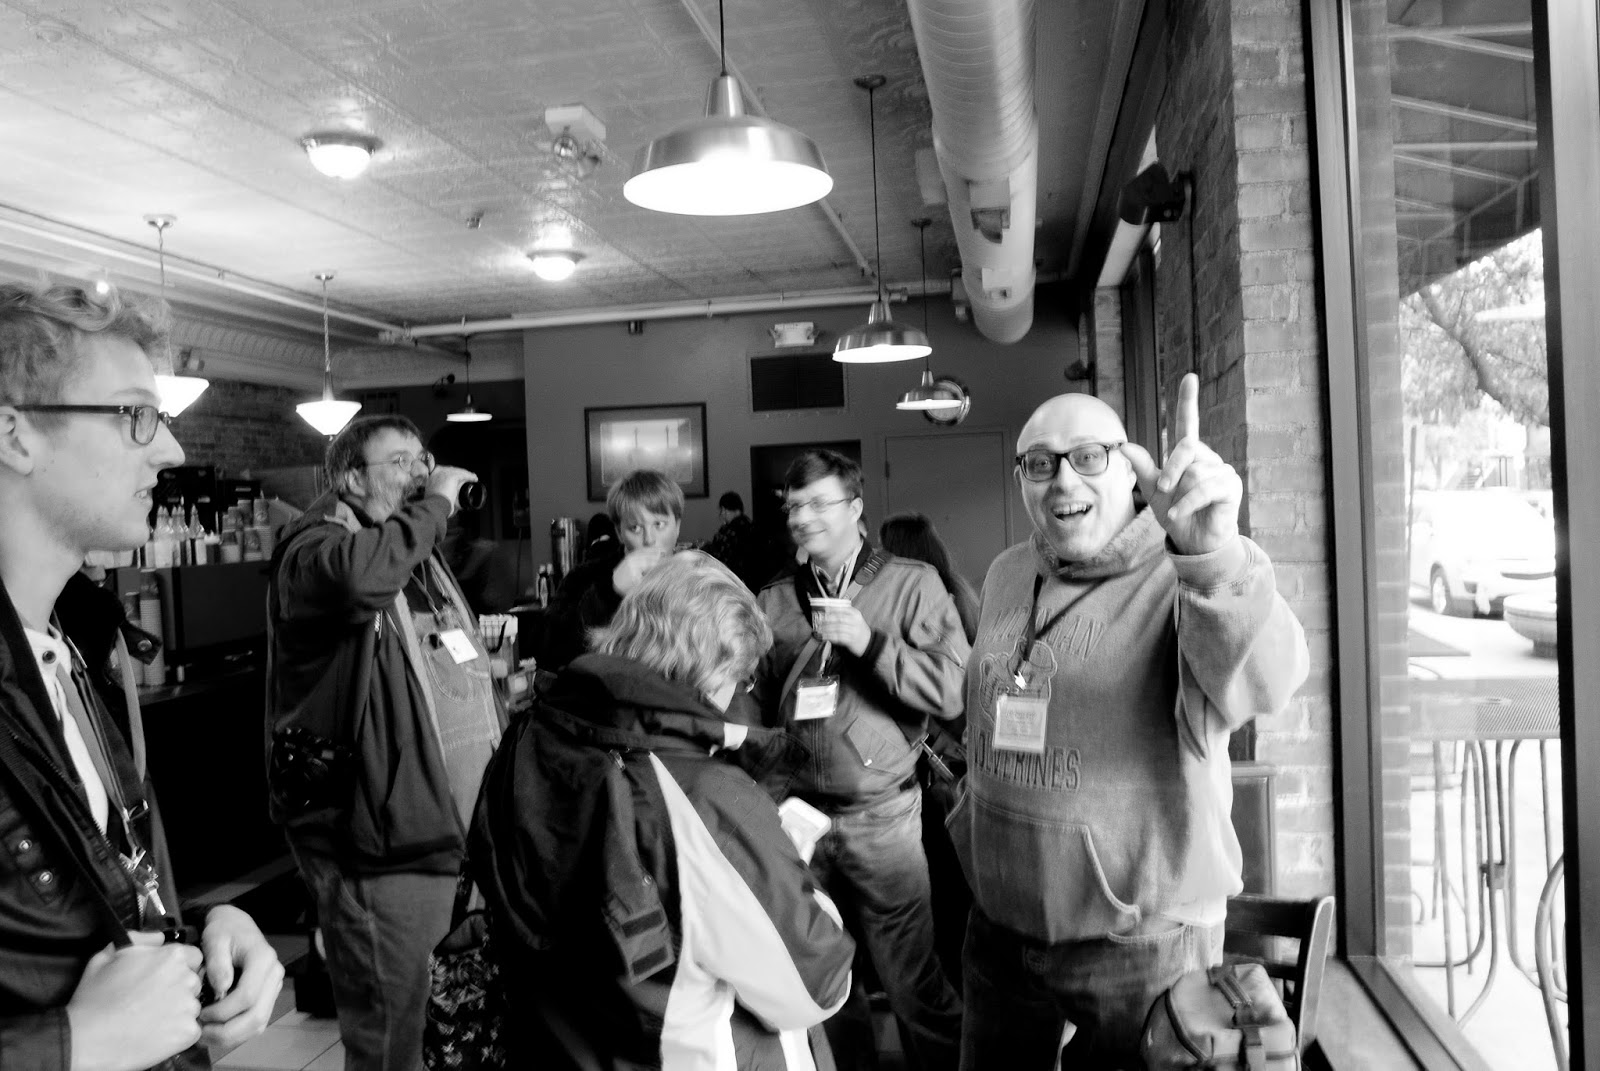
CameraMall before 9:30 am.  Desmond, Craig, and Christy were there to greet us with hot coffee, doughnuts, water, apples, granola bars, and more.  People were thrilled to have a real camera store to shop at and come in from the cool weather, and the place really had a vibe going.


Eventually, we split into several smaller groups, led by A3C3 members, and headed around the campus area and downtown to show off our town and get people shooting away.  Film cameras were clicking, from Dianas to Hasselblads.  It was a fun group of people-- some coming from as far away as California, Vancouver, North Carolina, Tennessee, Ontario, Minnesota, and New Jersey.  The participants were in good spirits the entire day, and while the weather got us damp, nobody complained.
After we split up for lunch, we then reassembled at 2:30 at our second rendezvous, the Argus Museum.  It is the ONLY camera museum that is in the same building where the cameras were once made.  Cheryl Chidester and her volunteers had cider and doughnuts and other treats ready for the group.  There is a new exhibit in the gallery called "Alchemy" featuring a lot of cyanotype work which I highly recommend.  Everyone was eager for the group photo, followed by the FPP gear give-away.
Some great items were given away: (view the event here)
  • Nikkormat 35mm Outfit
  • 50mm / 28mm / 75-200mm lens
  • Maxxum 7000 35mm Outfit
  • 35 - 80mm / 70-300mm lens
  • Contax 137 35mm Outfit
  • 50mm f1.9 / 35-135mm / 80-210mm
  • Canon FTb 35mm Outfit
  • 50mm f1.4 / 24mm f2 / 100-300mm Zoom
  • Nikon EM 35mm Outfit
  • 30-80mm / 80-205mm lens
  • Argus C3 "The Brick" w/ orig booklet
  • Lomo LC-A
  • Argus A-Four
  • Zenit 122K w/ 50mm f2 lens
  • Zenit 412LS w/ 50mm f2 lens
  • Nikon FM10 w/ 35-105mm lens
  • Olympus 35SP Rangefinder Camera
  • Fed 4 35mm Camera
  • Fed 5 35mm Camera
  • Canon QL17
  • Praktika LTL3 w/ 50mm f1.8 lens
  • Seagull 4A 120 TLR
  • YashicaMat 120 TLR
  • Kodak Brownie Hawkeye Flash, Bantam, and Jiffy-620.
  • various photo books
  • big bag of film
  • Ensign 120 6x9 cm box camera


photo by Tom Nighswander

We hung around until 5, when the museum had to close.  We then met again at 8 pm, and I led another photowalk for night photography.  The wind had died down, so it actually was pretty good weather.  20 or so folks were on the night walk, and we meandered our way downtown, often being asked by people "is there someone famous nearby?"  I guess our tripods and cameras gave us the look of a bunch of paparazzi!  There is lots of neon downtown, and I think people really enjoyed seeing our town at night.  It was a lively Saturday evening, for sure. We ended up at The Old Town for beer and food, ending our evening.  It was a nice finish to an amazing day.

Sunday was the day when Matt, Mike, Leslie and I set up for recording FPP podcast episodes at my house.  We worked from 10 until 8, and I have no idea how many episodes or parts of episodes we did, but I know my brain was fried by the end of the day!  It was a lot of fun, though, and I look forward to hearing Mike's well-crafted edits later on.  


One thing I had reinforced by the FPP AAPW -- film shooters are a diverse and fun bunch.  We have an amazing community, and I think the FPP has facilitated and broadened the appeal of using film.  It was no surprise to me that everyone had fun, and I could tell by the conversations going on around me that people really enjoyed the cameraderie  (excuse the pun) that the FPP has created.

I thank Mike Raso and Leslie Lazenby for their hard work to make this event happen. Also, special thanks to:
Camera Mall
The Argus Museum
Ultrafine Online
The Darkroom
(Obviously, the FPP Store)
the A3C3 volunteers (Tom, Patti, Adrienne, Heather, Tim)