Saturday, March 26, 2022

The Nikon Nikkormat - Today's Bargain?

As a 20+ year Nikon user, I've probably handled almost every Nikon film SLR that's been produced, except for an F5 and F6. It was probably about 21 years ago that I handled a Nikkormat for the first time -- a co-worker’s Nikkormat FTN.   About a year later, I acquired a Nikkormat FT2, which I used quite a bit doing macro and nature photography.  The fully mechanical Nikkormats differ from all other Nikons because the shutter speed dial is located around the base of the lens mount. If you have used an Olympus OM-1, you would feel quite at home handling the heavier and more robust Nikkormats.

Shutter speed dial. Also note the cold-shoe over the prism

The first Nikkormats were introduced in 1965, and were sold as a cheaper alternative to the Nikon F.  You sometimes see Nikomats, which were for Japan's market, but are the same cameras in all respects except for the name on the front.  I suppose Nippon Kokagu thought of the Nikkormats as "amateur" cameras, since they were not a modular system like the F, yet they produced the same results.  Obviously, a lot of pros used them as well, since they were solid cameras at a lower price point.

Nikomat, AKA Nikkormat

The Nikkormats were designed to be reliable, robust SLRs with non-removable prisms, and with less bulk than a Nikon F with a metering prism.  They also differ from the F in having a Copal-square vertical metal shutter with speeds up to 1/1000 sec.  In addition, the back of the camera is hinged, making for easier film-loading.  

THE NIKKORMAT LINE-UP

Nikkormat FT

Nikkormat FT -  1/125 flash, sync, ISO settings 12-1600, a cold-shoe is attached separately to the prism via a ring around the eyepiece. In fact, you often see FT's without a cold shoe attached.  Depth of field preview, mirror lock up, built-in exposure meter, X and M flash sync, 1.3V PX-625 mercury cell for the meter.  The FT requires you to also set the film ISO when you set the maximum lens aperture.  That inconvenience was fixed with the FTN model.

Nikkormat FS

Nikkormat FS - basically a stripped-down version of the FT without a meter, so there are no indicators for exposure, and no battery. There is also no mirror lock-up. Since there is no metering, there is no indexing prong, making this camera able to use just about any F-mount lens, but of course, with no built-in metering.  They are less commonly encountered than any of the other Nikkormat models, and are now collectibles.  Still, using one is pretty simple, much like using a Nikon F with the eye-level, non-metered prism, but with 92% coverage in the viewfinder. I reviewed this camera in 2013.

Black Nikkormat FTN


Nikkormat FTN - Introduced in 1967, it improved upon the FT with center-weighted metering, shutter speed seen in the viewfinder, and +/- indicators in viewfinder for metering.  Still, the cold shoe is an accessory.  Later production saw a plastic cover on the film advance lever.  This is the most commonly seen Nikkormat as the production run was from 1967-1975.  I have bought and sold a lot of them.

Nikkormat FT2 - my current shooter

Black Nikkormat FT2

Nikkormat FT2 - This model was produced from 1975-78, and featured a built-in prism-mounted hot shoe and the use of a 1.5V LR-44 cell for the meter. A locking film speed selector prevents accidental changes, and the PC flash connector will auto switch for X or M sync, if necessary.  This is my favorite model of the Nikkormats, and one that I always seem to have around at one point or another, if only to use some good old non-AI lenses.

Black Nikkormat FT3

Nikkormat FT3 - Produced for only a short time (1977-1979), as the Nikon FM was released in 1977.  The FT3 is auto-indexing, so there is no coupling prong on the front.  It uses a 1.5 v silver-oxide cell, and all other features are similar to the FT2.  It was the last fully-manual Nikkormat, and the last one with the shutter speed ring around the lens mount.
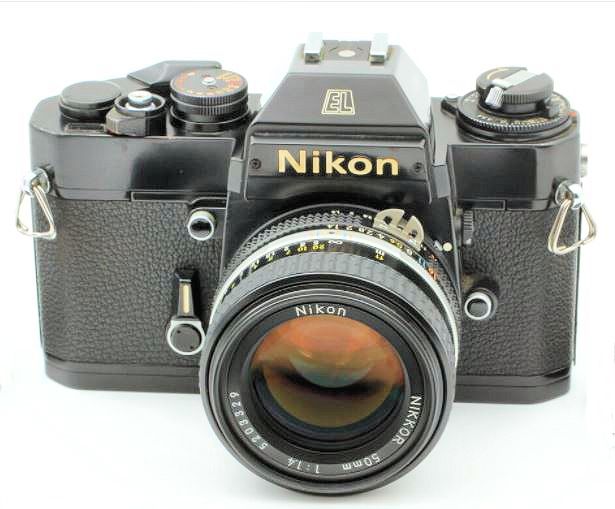
Nikkormat EL

Nikkormat EL - The Nikkormat EL was introduced in 1972, and is a completely different beast from the fully manual Nikkormats above.  It uses a 6v PX-28 battery that inserts into the interior of the camera via the mirror box.  The shutter is an all-electronic Copal square shutter that requires power to function.  The EL is an aperture-priority camera, with shutter speeds of B, 4 sec- 1/1000 sec. There is no exposure compensation dial.  60/40% center-weighted metering, mirror lock-up, ISO settings from 25-1600, built-in hot shoe, and a battery test button.  The Nikkormat EL is roughly equivalent to the Nikon FE, except that it uses non-AI lenses, and is a more robust camera. The shutter speed is on a dial on the top deck of the camera where "it's supposed to be" like all other non-Nikkormat F series models.

Nikkormat ELw - quite rare, and it was the first "Nikkormat" that could use an  autowinder, the AW-1.  It was only produced between 1976 and 1977.  I have never seen one in person. 

Nikon EL2 - nice if you can find one!

The Nikon EL2 is often categorized with the Nikkormats. However, the camera has Nikon on the front, not Nikkormat.  It’s an AI body, so there is no metering prong as with the EL.  It also has an exposure compensation dial. It also had a short run of production, from 1977-78, most likely because the Nikon FE was the better option for an aperture-priority camera. It can also use the AW-1 autowinder.


Nikkormats have ISO settings from 12-1600


Using Non-AI  Nikon camera bodies

Any old-timers (like me) that have used the older Nikon bodies are familiar with the mounting of lenses on non-AI (non Auto-indexing) bodies - which would be the Nikon F, F2, and Nikkormats up to the FT2 and EL.  For these cameras, you need to do the "Nikon twist." That involves the following:

1. Set the aperture of the lens to f/5.6

2. make sure the indexing prong is properly situated at the front of the camera (at the index dot)

3. Press the lens into the lens mount

4. As the lens is inserted, and the bunny ears (indexing tab) have captured the indexing prong, twist the lens to the left, and then the aperture all to way to the minimum (f/16 or f/22) and then right, to the maximum aperture.

This process tells the camera the maximum aperture of the lens, which is why they are called non-AI.  Non-AI lenses have solid bunny ears and no metering ridge at the edge of the lens barrel.  Auto-indexing (AI) lenses have holes in the bunny ears, as do AI-S lenses.  AI and AI-S lenses with the bunny ears can be used on non-AI bodies, but non-AI lenses cannot be used on most AI bodies because they lack the metering ridge.  In fact, unless a non-AI lens has been modified, it will break the metering tab on the body of the camera, with the following exceptions: Nikkormat FT3, Nikon FM, FE, EL2, and F3. In these cameras, a small chrome button at the edge of the lens mount is pressed to release the metering tab so that you can mount a non-AI lens - but you'll have to use stop-down metering for a proper exposure on those cameras.  


The Nikkormats are solidly-built SLRs that are certainly quite reliable, but as the years have passed by, the major problem is that the resistor ring that controls the input into the light meter may have deteriorated, and there are no new replacement parts.  What I often see is what is called a "jumpy" meter.  The needle in the viewfinder will be erratic at first, and will sometimes settle down to what the true exposure should be.  If the resistor is in really bad shape, the meter will just give you a crazy value that is obviously wrong, or not move at all. The shutters are reliable, as are all other operations in the fully manual Nikkormat F series.  They are "beasts" that are certainly heavier than the Nikon FM and subsequent smaller-bodied SLRs. Yet, they have a retro charm that many people find appealing.  

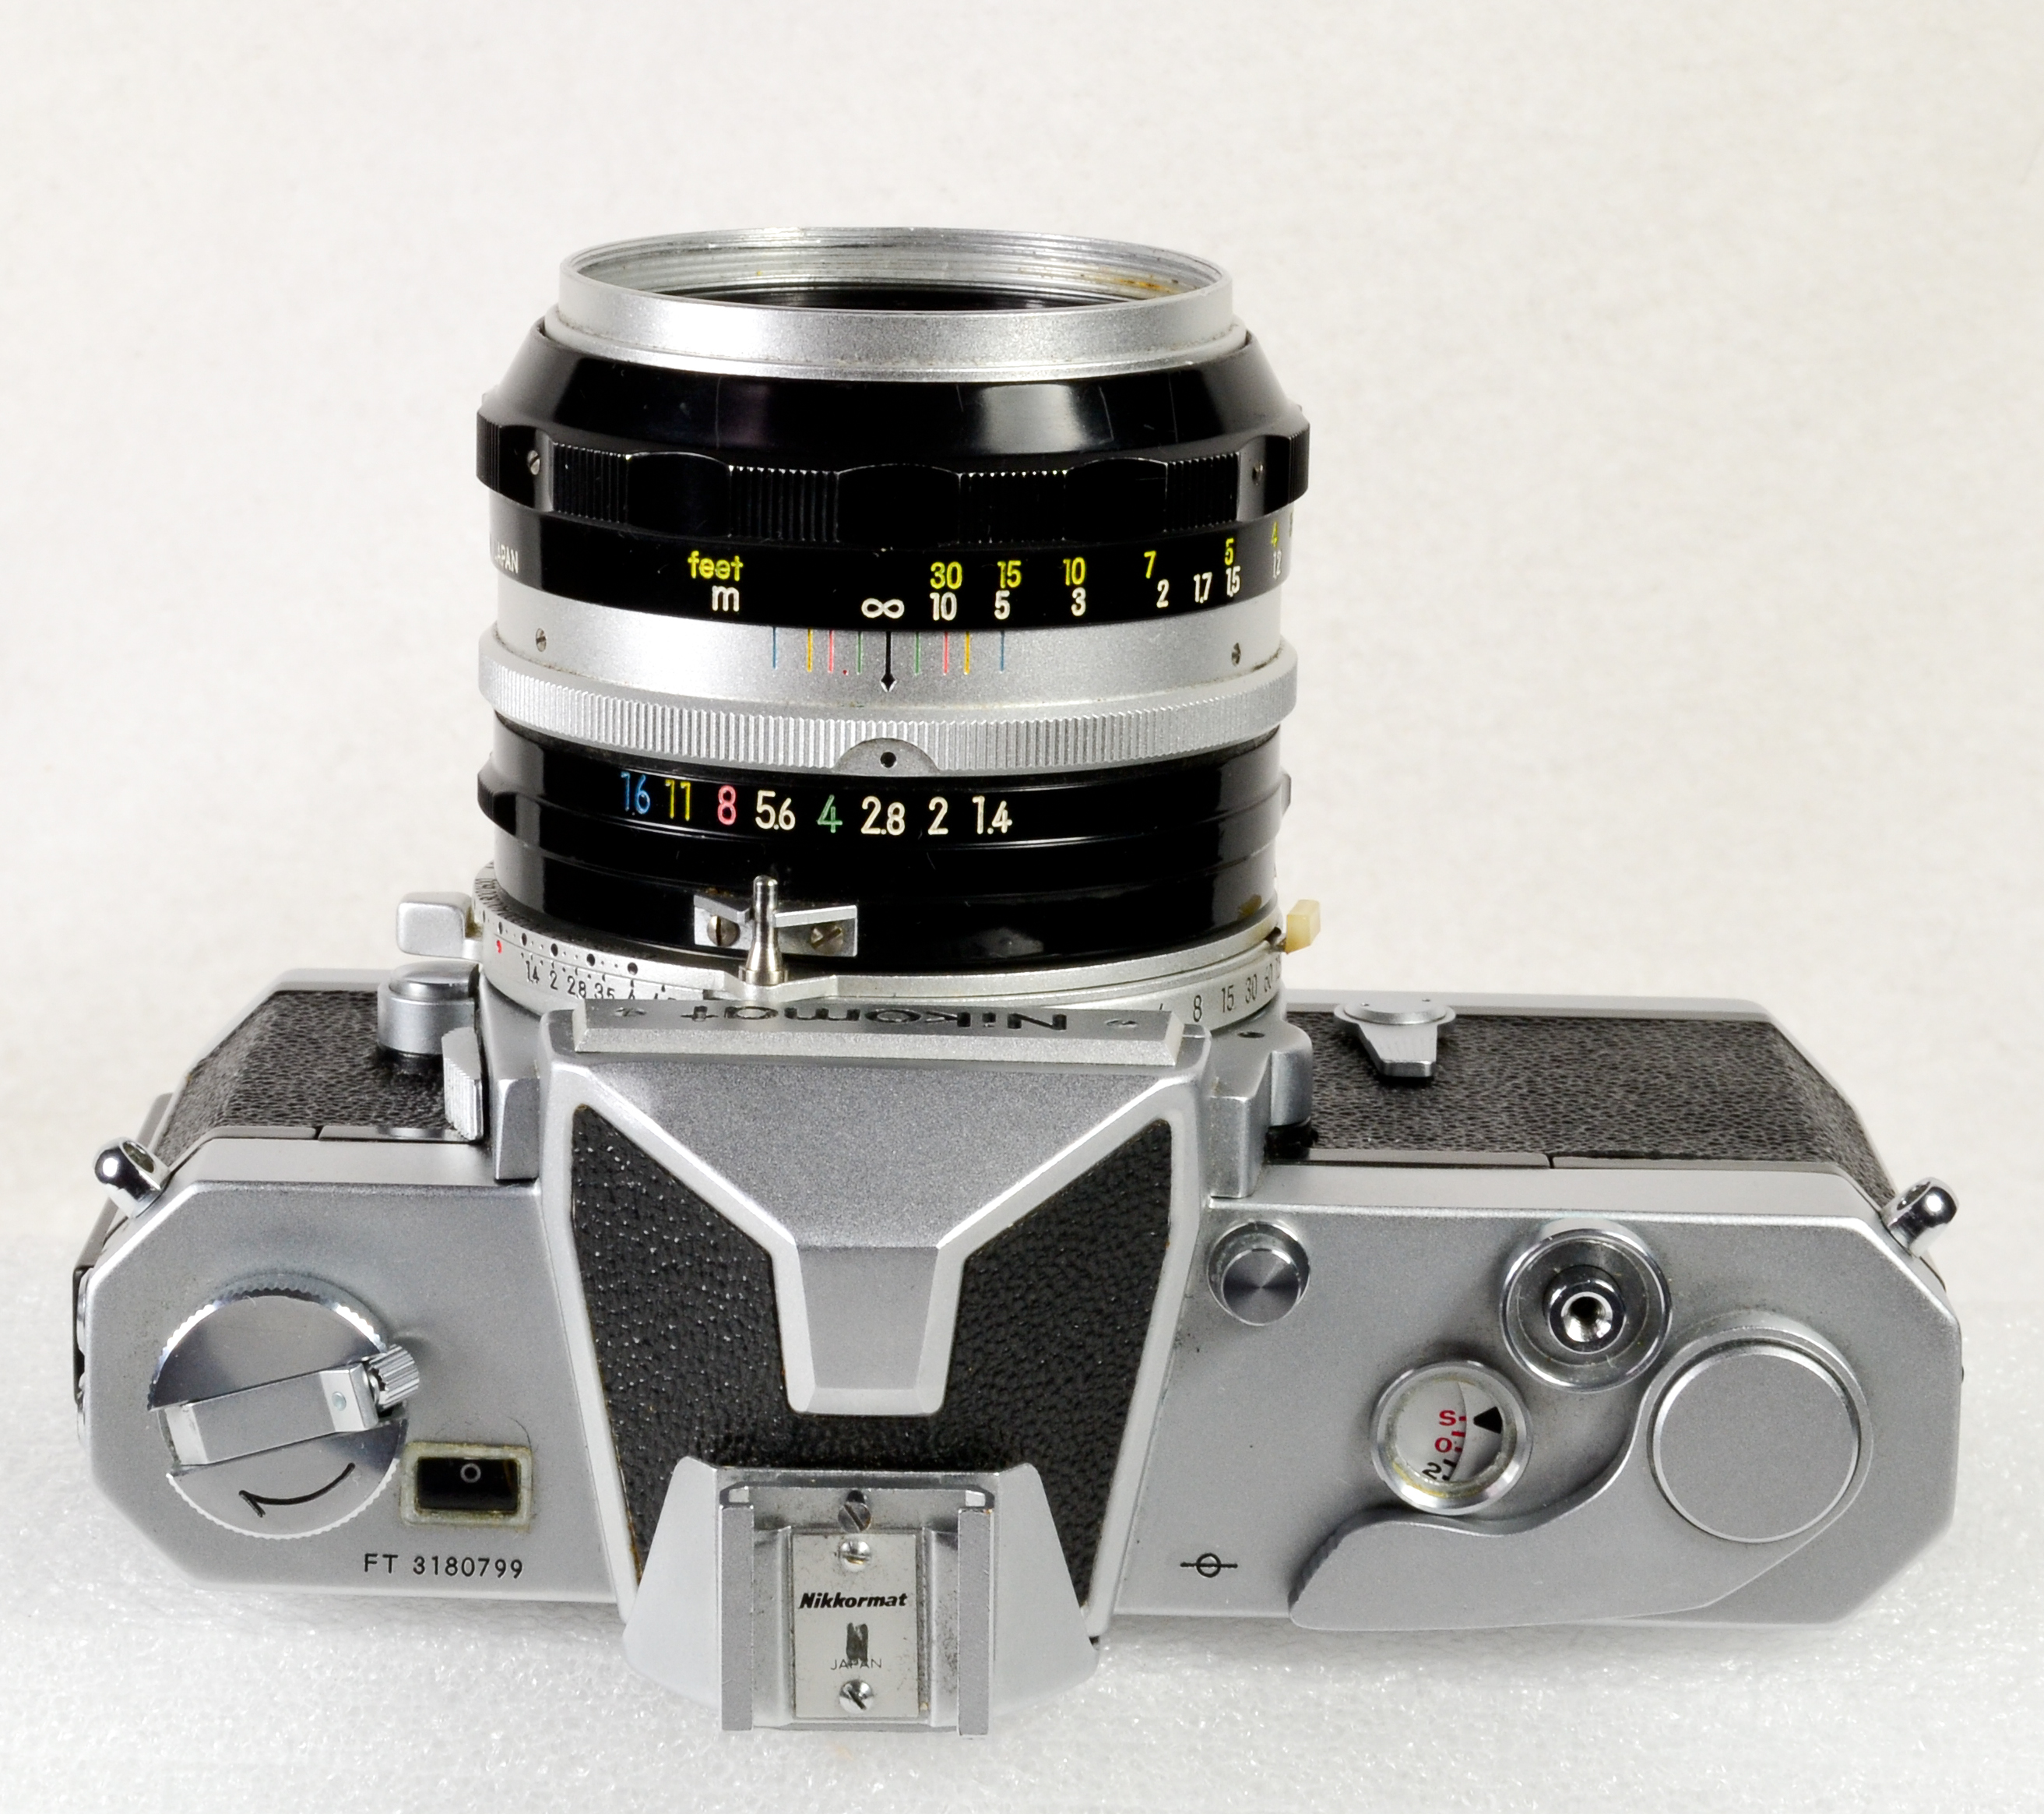
The clean top deck of a Nikkormat FT. 

Are Nikkormats a good buy today?

Given the low prices that most of the Nikkormats sell for on eBay, I would say that if you are looking for a fully manual SLR, the Nikkormat FT2 and FT3 are obvious choices due to the use of 1.5V cells to power the meter.  You can use a 1.5V PX625A for the FT and FTN and adjust for the slightly-off exposure. You can also use an external meter, a phone app, or sunny-16 to shoot and not use a battery, or if the meter's not working.  I think the biggest drawback for novice users of these cameras would be the unfamiliarity of the non-AI meter coupling procedure.  Most of these cameras are around 50 years old or more, and although I have had many pass through my hands in good working condition, some of them have been affected by salt water corrosion, misuse, banged about, or just beat-up by years of use.  

Four FTN bodies that I sold for parts/repair

Since they are fully manual, with the exception of the EL series, there are fewer things to go wrong, and like any camera from the late 1960s to early 70s, caveat emptor.   Having said that, aside from the metering, most Nikkormats have a lot of life left in them. You can pick up a pretty nice Nikkormat FTN on eBay for less than $50.  Black models seem to sell for a bit more than the chrome ones.  A Nikkormat FT2 with a lens will sell for about $50-125, and an FT3 usually sells for $100-$175.  Nikkormat EL prices range from $25-150.

Some Non-AI Lenses on the Nikkormats

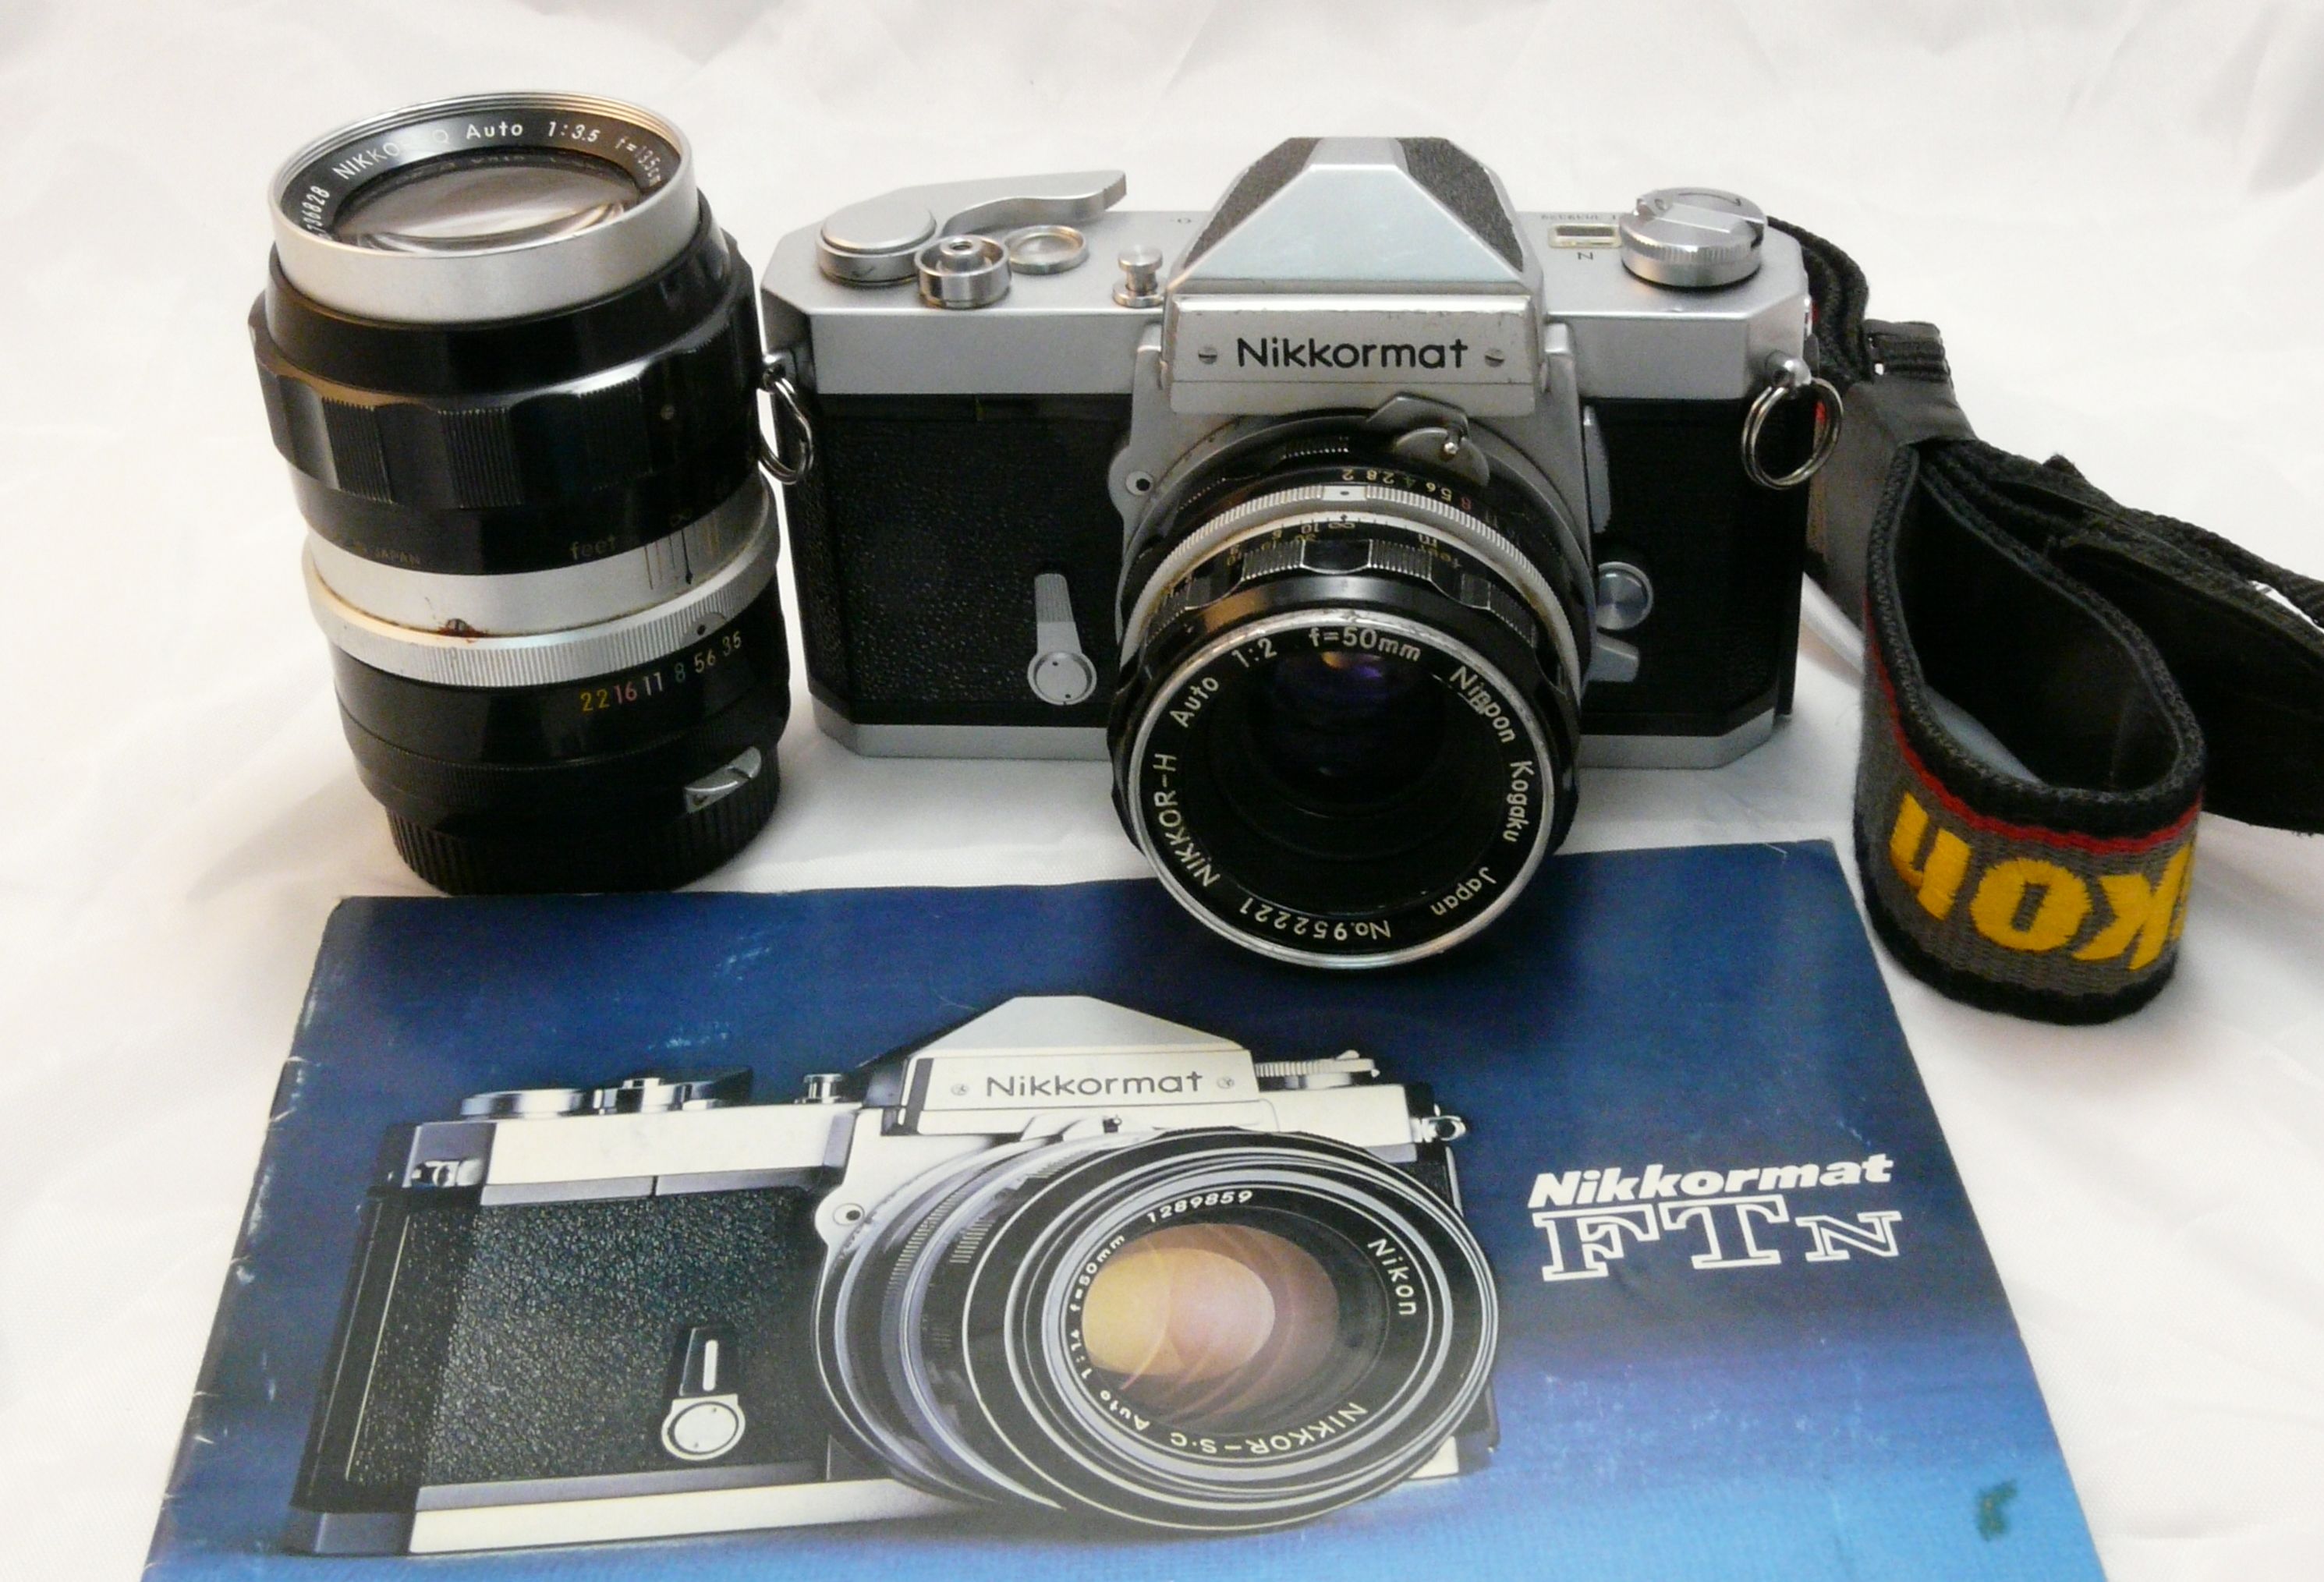
My all-time favorite non-AI lens is the 50mm f/2.0 Nikkor-H.  While not as fast as the 50mm f/1.4 Nikkor-S, it is a lens with no aberration, extremely good resolution, and will close-focus to 2 feet.  It has a 52mm filter diameter, and has an aperture range of f/2-f/16.  They are easy to find on the used market, and definitely worth more than they typically sell for. The very earliest version of this lens will have Nippon Kokagu on the front, labeled as a Nikkor-S, with the focal length given as 5 cm.  The focus distances are in feet only.  It was the first lens to be released with the Nikon F in 1959.

The letters after the Nikkor, such as H, S, etc., refer to the number of elements in the lens - Q=4, P=5, H=6, S=7, O=8, N=9. These designations did not carry over to the AI lenses and beyond. They are just called Nikkors.

Non-AI lenses to have -

20mm Nikkor-UD f/3.5 - amazing lens for its time, and that ultra-wide view is great. It has a 72mm filter thread.

24mm Nikkor-N f/2.8 - 24mm is my favorite for wide without too much distortion.

28mm Nikkor-H f/3.5 - fantastic normal wide without distortion. Compact, with great results.

35mm Nikkor-O, f/2.0 - a larger lens than the 50mm, it focuses from 1 ft - infinity.  

50mm Nikkor-S, f/1.4 - Pretty much an every-day lens, and with the wider aperture, great for low-light. There are two versions - one with sharply angled bunny ears, and one with the typical bunny ears.  I have one that was factory-modified to be an AI lens, and it's a wonderful lens to use on my Nikon FM3A.  

55mm Micro-Nikkor f/3.5 - this is the original Nikon Micro-Nikkor, and it's as sharp as a tack with a minimum aperture of f/32! It focuses on its own to 1/2 life size and with the M extension tube, it goes to 1:1.  Great on a bellows, or with other sizes of extension tubes.

85mm Nikkor-H, f/1.8 - A great lens for portraits.  The minimum aperture is f/22.  

105mm Nikkor-P, f/2.5 - Fantastic lens that continues to be great for portraits, nature, etc.  Add an extension tube for great close-ups.

135mm Nikkor-Q, f/3.5 - a more compact lens than the 135mm f/2.8, it's never as popular as it was in the 1960s.  Yet, it has its uses, and they are pretty cheap.  The 135mm f/2.8 is a huge lens with its a sliding lens hood.  If it matters, I find the Tamron 135mm f/2.5 Adaptall-II lens to be superior and smaller.

200mm Nikkor-Q, f/4 - an  under-appreciated lens that works wonderfully with either a diopter or an extension tube for butterflies, etc.  There are several versions of this lens, but the original with the silver and black barrel typically sells for very little.  Minimum aperture is f/22.

80-200mm f/4.5 Zoom-Nikkor-C.   A true zoom lens, with focus staying the same as you zoom in or out from your subject. Minimum aperture is f/32! 

Building a kit with all of the lenses above will likely cost less than one of today's digital mirrorless Nikkor zooms.  Except for the 20mm, all take 52mm filters.  They are made of metal and glass, with no plastic, no rubberized grip, and all-manual everything.  The later models, with a C designation, have better multi-coated surfaces, but all are excellent for black and white photography.

For further reading:

Peterson, B. Moose. 2000. Nikon System Handbook, 6th ed. Silver Pixel Press, NY.

Cooper, Joseph D.  1969. Nikon Nikkormat Handbook, Amphoto, NY.

Comon, Paul. 1996. Nikon Classic Cameras, F, FE, FE2, FA, and Nikkormat F series. Magic Lantern Guides, Silver Pixel press, NY

Stafford, Simon, Hillebrand and Hauschild, 2004.The New Nikon Compendium.  Lark Books, NY.

https://mir.com.my/rb/photography/hardware/classics/nikkormat/html/history.htm - a good starting point online for Nikkormat information


Friday, March 18, 2022

Monochrome Mania No. 7 Available


It's taken me longer than I anticipated, but The Magic and Allure of Toy Cameras, Vol. 2 - 35mm, is now available from my Etsy store. At 40 pages including the covers, it's chock full of information and images of 35mm toy cameras, from the very first "35mm" the Kodak 00 Cartridge Premo, to the latest Reto Ultra Wide and Slim.   You can purchase The Magic and Allure of Toy Cameras, Vol. 2 - 35mm at my Etsy store.


First of all, let me tell you about my journey with 35mm toy cameras.  Starting in 2000, when I was really becoming a student of photography - not in the literal sense as a student, but as someone serious about learning all that I could about photography, toy cameras were not on my mind as a creative tool.  I had grown up with the Kodak Instamatic as the camera that was close at hand, and when I got my first 35mm SLR, an Exakta Exa 1a in 1973, it was my every-day camera for a number of years.  My experience with "toy cameras" didn't really happen until the early 2000s, and when I started playing around with them, I found them to be fun adjuncts to the more serious Nikons and my Rollei TLR, and as I shot more with the Holga and other crappy cameras, I saw how they could become a real asset to anyone shooting film that wanted something out of the ordinary.  Over the years, I have always had my share of toy cameras, and when I published the third issue of Monochrome Mania that featured 120/620 toy cameras, I knew that a follow-up with 35mm cameras had to be done.  It turned out to be not as simple as I thought it would because there are so many more cameras, and I also needed to hunt down and purchase certain models that I knew had to be covered if I were to do a more complete guide to them.  


some sample pages from MM #7.


So, after quite a few more months, I had written a large part of the text, but it really wasn't until late in 2021 that the issue really started coming together. Some days. I would find myself down the Google rabbit hole pursuing information on cameras that just a decade ago, were brand-new, and now very hard to find.  I also knew that there was no way that I could test them all in time for the this issue, nor could I actually get my hands on every single model.  My goal here is to give the reader a good overview of the history of these cameras, with examples of the many types that have been available.  One could spend many years tracking down every example of a 35mm toy camera, and I'll leave that for some other soul.  I think that you will certainly get a lot from this issue, and I hope that I sell them all in a short time!

Due to the full-color printing and the price increases in the publishing industry and postal rates, I have raised the price of MM #7 to $12 + $3 US shipping.  Friends tell me that I am underpricing this issue and should sell it for twice the price.  However, I want to keep it affordable for everyone so long as I cover my expenses and make a small profit.  The price certainly doesn't include the money I spent in obtaining cameras to test and photograph.  I'll recoup those expenses by selling many of these cameras in my Etsy store, so after reading this issue, be sure to check what I have on Etsy in a few weeks, as I start including some of the cameras in the zine in my Etsy offerings.

I look forward to hearing from the readers what they think of this latest issue!

This image

shot with this camera.


Sunday, March 13, 2022

KODAK'S TRI-X SINGLE-USE CAMERA


Last year, Kodak introduced their single-use camera loaded with a roll of Tri-X film.  I was initially skeptical, but finally ordered one from the Film Photography Project Store.  Seeing that I have been working on an issue of Monochrome Mania dedicated to 35mm toy cameras, I really had to try out this camera (the issue will be available in late March from my Etsy shop).  For starters, the phrase "Kodak Professional" on the front of this little plastic camera seems laughable, but just go with it.  The camera is pre-loaded with a 27 exposure roll of Tri-X, which is a 400 ISO black and white film. There is a built-in flash, so other than the film, the camera is similar to Kodak's Fun Saver series of cameras. I mostly shot outdoors, and only used the flash as a fill-flash and not as the sole light source, so I did not evaluate the performance in a dark indoor setting.  I suppose like any of these cameras, the small flash will be good for up to 10 feet.  The angle of view is wide, as the lens is a 30mm f/10, 2-element acrylic lens.  The focus distance is 1 meter to infinity. 


 I shot with the camera over the course of over a month, and its compactness allows it to easily fit into a shirt pocket, as well as any space in a camera bag. I should note that I taped a yellow gel over the lens when shooting on sunny days, so that I would not overexpose the image, and to achieve better tonality.  After I was finished with the roll, I opened the camera body and removed the film cassette, which other than the serrated top of the spool, looks like any other roll of Tri-X, and with the chrome cap ends. 


I developed the film in the FPP D-96 developer for 8 minutes, and did the standard fix and wash that I do for all my black and white films.  Overall, I have to say that I am pleased with the results.  Tri-X fell out of favor with me because the film base always cupped when dried.  That's a real pain in the ass when I am trying to load it into the Epson scanner  film holders, and films that lie perfectly flat are my preference.  Perhaps Kodak's made some changes, because this time, the film was almost perfectly flat.  The other factor is that the cameras are assembled in China, and maybe the film is made there, as well.  That could be a reason for the difference.

If you are new to film photography, and want to experience shooting B&W, this is a good way to try it out.  I have seen prices in the $11-$14 range, so the camera is pretty cheap.  On the other hand, Ilford has a single-use B&W camera loaded with Ilford HP5+.  I've not tried the camera, but HP5+ is the film that I prefer over Kodak Tri-X.  The price for the Ilford alternative is in the same price range.   In addition, Harman sells a single-use camera loaded with Ilford XP-2, a C-41 film (that can also be developed in b&w chemistry).  Lomography also sells a simple-use camera loaded with 400 ISO Lady Grey film. If you just want a simple camera loaded with B&W film, you could get a Harman 35 reloadable which comes with 2 rolls of Kentmere 400 for about $30.  

Three other choices for a simple to use camera with B&W film: Ilford B&W, Harman B&W, and Lomography Monochrome

The Harman camera w/2 rolls of Kentmere 400 is a good value.

You CAN reload the Kodak camera with another roll of film, and if if you are careful opening the camera body, you'll quickly see how that would work.  It would probably be best to use a 24-exposure roll as the counter starts at 27.  I'll give it a try later on and see if it works with a normal cassette, or if I have to use the one with a serrated end to the film spool (like the one that was in the camera).  The wider view of the Kodak camera certainly is a plus, and I felt that the lens was plenty sharp enough. 

Of course, if you don't develop film yourself, The Darkroom Lab can develop it and you can get scans and prints from that roll of Tri-X.  

Here are some examples from the roll of Tri-X, and I am quite happy with them.


Thursday, March 10, 2022

YETI ANOTHER ADVENTURE IN FILM


Now available in the Film Photography Project Store, YETI  is the latest in their "monster" film series. What is the story behind the YETI?  I really don't know, but I think because the film is a glacially slow ISO 6, the YETI is the perfect "monster" to be the face on the film container.  It could also be based on Mike Raso's expression as he sits in the FPP HQ during the cold winter months.  However YETI arose, it's an interesting SLOW black and white film that is blue-sensitive (orthochromatic). The intended use for this film stock is in the cine world, where it was used for contact copying of titles and mats in motion pictures.  It has a very fine grain, and nice tonality, and since it's blue-sensitive, it makes for an interesting film for portraiture.   It should be shot in daylight for best results.

YETI comes in 24-exposure rolls, which is probably best for these unusual films. It has a PET  (Estar) plastic base, so it light-pipes like crazy.  Store it in black plastic film cans and load in subdued light.  My experience with it has shown me that loading in direct sunlight is a real no-no.  So, load the film into your camera indoors, if possible.  Since it has an ISO of 6, you can only use this film in an SLR or a rangefinder camera where you can manually set the shutter speed/aperture/ISO.  Automatic cameras, such as point and shoots cannot be used with these low-ISO films.  If your camera can't go down to ISO 6, there are several ways to determine the correct exposure.  If your camera's ISO dial only goes to 25, and you have an exposure compensation dial, set it to +2 stops.  If there is no compensation dial, you'll have to manually compensate in the exposure.  You can use a light-meter app on your phone to determine the exposure if you want to go full manual.  You can also try sunny-16 if you wish, as follows:

full sun at f/16, ISO 6 = 1/6 sec , therefore f/11= 1/12 sec (1/15); f/8= 1/25, f/5.6= 1/50, f/4= 1/100 sec f/2.8= 1/200 sec., f/1.4 = 1/500 sec.

That's for full sun.  Make the appropriate changes for cloudy conditions, etc. So, on a sunny or cloudy-bright day, you can shoot this film hand-held at wide apertures.  On any other conditions, a tripod is recommended.  

My favorite camera with these slow films is my F100 or my F4, since ISO 6 is available as a setting. That's because I'm lazy and don't like to extrapolate in my head with cameras that can't go that low, and since I like aperture-priority, it all works smoothly with  my chosen cameras.   I used my Nikon F3HP for the first roll, and as the ISO setting only goes to 12, I used +1 to +1.5 for the shots (compensating more when the subject was bright water). An external light-meter that can go to ISO 6 is not that common, but my iPhone light meter app goes to ISO 1.  Shooting films like YETI wide open on a sunny day gives you some creative possibilities that you just won't get with normal films.

Orthochromatic films are also a different experience to shoot with, vs panchromatic films.  A blue-sensitive film means that reds will register as dark tones, so skin will be darker, and blue skies very light.  Again, slow and orthochromatic will be somewhat like shooting film in the late 1800s. A definite creative opportunity!

YETI is one of the films that you really ought to try out. It develops easily in common developers, and unlike some high-contrast slow films, it has a normal tonality that does not require the use of special developers to achieve proper contrast.  

I shot YETI film in situations that I might normally encounter, and I'm pretty happy with how they turned out.  I definitely will be shooting some urban scenes with it soon, now that spring has arrived and I'm exploring more in my area.

I developed my YETI in D76 1:1 for 11 minutes for the first roll (images 1-3 below) and the second roll in D-96 for 7.5 minutes at 20°C for the last three images.

Some examples from the two rolls that I shot.


Sunday, March 06, 2022

A Tale of Three Films

I typically have a variety of film types in my camera bags, so that when I pick one up, it's ready to go.  The types of films I include in the bag usually reflects the cameras inside and the type of photography that I use them for.  For example, my small bag with the Leica M2 has b&w ISO 100 & 400 film, whereas my canvas shoulder bag often has the camera of the week that I am using, along with the right lenses, as well as a couple of toy cameras, etc.  Therefore, it has a variety of film types from color to low-ISO b&w.  

On Feb. 25, we had friends visiting and I thought we might to go the NC Aboretum, so I grabbed the canvas shoulder bag.  I had to make a stop at the local post office first, and when I got back into the car I decided that we would go N instead, to Rocky Fork State Park in Tennessee.  It turned out to be the right choice, as everyone really enjoyed Rocky Fork, and the volume of water roaring through the creek was quite amazing.  

My canvas messenger bag 

Unfortunately, the Nikon FM2N SLR that I had in the bag was loaded with Fomapan 400.   It was also a sunny day, which is not ideal for photographing waterfalls. Oh well, I had to make do, so I put on a 2X Neutral Density filter and a polarizer, so that I could take longer exposures in the semi-sunny conditions along  Rocky Fork.  Once I finished the Fomapan 400, I decided to use a slow film, so I pulled out a roll of Adox CMS 20 II, and loaded it. That was a mistake, in hindsight, as you'll see from the images.  After that roll was done, I used a roll of Eastman 5231 - an expired cine film that's a lot like Plus-X.  It's rated at ISO 80, so with a polarizer, I was still getting some good 1/2 second exposures.  Of course, I wouldn't know any of this until after I developed the film, and that's one of the things that I like about film - be prepared to fail, or succeed spectacularly.

Rocky Fork State Park is a stream with a pretty exciting course through rocky terrain, and having been there a number of times, I know what sections are the most photogenic later in the year. But after some recent rains, just about any part of this stream with cascades of plunge pools, and white water is going to be photogenic. My trusty 22-year old Bogen/Manfrotto tripod has certainly been to its share of riparian scenes, and yes, if you want to shoot water scenes with long exposures, hand-held is not gonna do it, no matter what camera system you are using.  I started with the 24mm Nikkor on the FM2N, and then went to the 50mm. While I used the ND filter and the polarizer with the Fomapan 400, I just used the Polarizer with the Adox and Eastman films.

The Fomapan 400 was developed in HC-110 B for 7 min, the Adox CMS20 II was developed in D76 1:3, for 10.5 minutes, and the Eastman 5231 was developed in D96 for 6.5 minutes.  The Fomapan 400 looks like it always does - grainy, but otherwise, okay.  The Adox CMS 20 was NOT the right film for this, though, and probably the D76 1:3, while one of the suggested developers  in the Massive Development Chart, it would probably have been better going with a Technidol-style developer, as the Adox film is very contrasty, and did not have much latitude. The clear polyester base really shows the lack of grain, but also the high contrast. I'll try this film again, but in a situation where the lighting is even, and also rate it at ISO 12 instead of 20.  The real champion that day was the Eastman 5231 film.  I have a large supply, thanks to my friend Bill Pivetta, and I look forward to shooting more of it in the future.  At Rocky Fork, it was the perfect film with great latitude, low grain, and in the mixed lighting (sun and shadows), it showed how great it really is.  

This is not just a tale of three different films, it's a microcosm of the film world. Yes, I could have just shot Rocky Fork with my Nikon Df and not have to worry about film, and making adjustments as I worked the creek.  But you know what? By using film, I was learning something new, and creating a body of work that I can derive great satisfaction from.  It's not that the Adox film was a failure, it was just the wrong film for the conditions, and I learned from that.  The Fomapan was grainy, yet, I liked the effects that I got from it.  The Eastman 5231 is butter,  Smooth, creamy, and it really did well in the shadows and highlights. I don't want it to sound like I am knocking digital, but I could churn out a 100 digital images of Rocky Fork without even breaking a sweat and would have learned nothing new. Sometimes the journey IS the reward. 

Herewith are samples from the three films.

Fomapan 400-


Adox CMS 20 II-


Eastman 5231--


As you can see from the above, I did get some nice images from all three films.  However, the Eastman 5231 really performed the best when considering the overall exposure.  The shadow detail in the Adox is pretty bad, and the Fomapan 400 certainly did fine with the shadows, but one may not like the grain.  It's all a matter of taste and expectations.